Upload 3D Data
Model vs. Project
You can upload the model in the .glb format without defined spatial reference to the Earth and place the model manually into the web scene, or upload the project in the ZIP archive in a required schema with already defined spatial reference to the Earth.
Neither the model, nor the project is not uploaded to any server – it is just temporarily created in your web browser. All these temporary data are deleted after the reloading of the web application.
Import 3D data funcionality is primarily intended for desktop devices; there are some limitations when using mobile phones (see Place Model into the Web Scene).
Maximum uploaded file size is 50 MB
Model
The web application supports only the GL Transmission Format (binární) .glb. This format does not contains spatial reference to the Earth, however the application enable you to place the model into the 3D web scene and thus perform georeferencing (into the geographic coordinate system WGS84). The model can be then exported to project by the tool Export to Project of the widget Insert 3D data. See the section Data Preparation to create properly the .glb file in the 3D graphics software.

Project
The project is read to the web application in the ZIP archive. The archive always contains the model in .glb format, it has defined name and is placed to the spatial reference system WGS 1984 (WKID: 4326). It is the project which enables the sharing of the building plans with third persons.
The project can be easily created in the proper schema with the tool Export to Project found in the widget Insert 3D data. The project then appears in the widget Projects. The ZIP archive contains the model in .glb, the CSV file with the geographic coordinates of the snap point and the name of the project.
Furthermore, the ZIP archive of the project can be prepared out of the web application in advance in ArcGIS Pro (more in the section Data Preparation, subsection Project Preparation: ArcGIS Pro) and then uploaded to the web application in the same way. Be aware, that schema of the ZIP archive is different in some parts – CSV instead of .prj with the definition of the spatial reference system and JSON with the model’s metadata used by ArcGIS Pro.
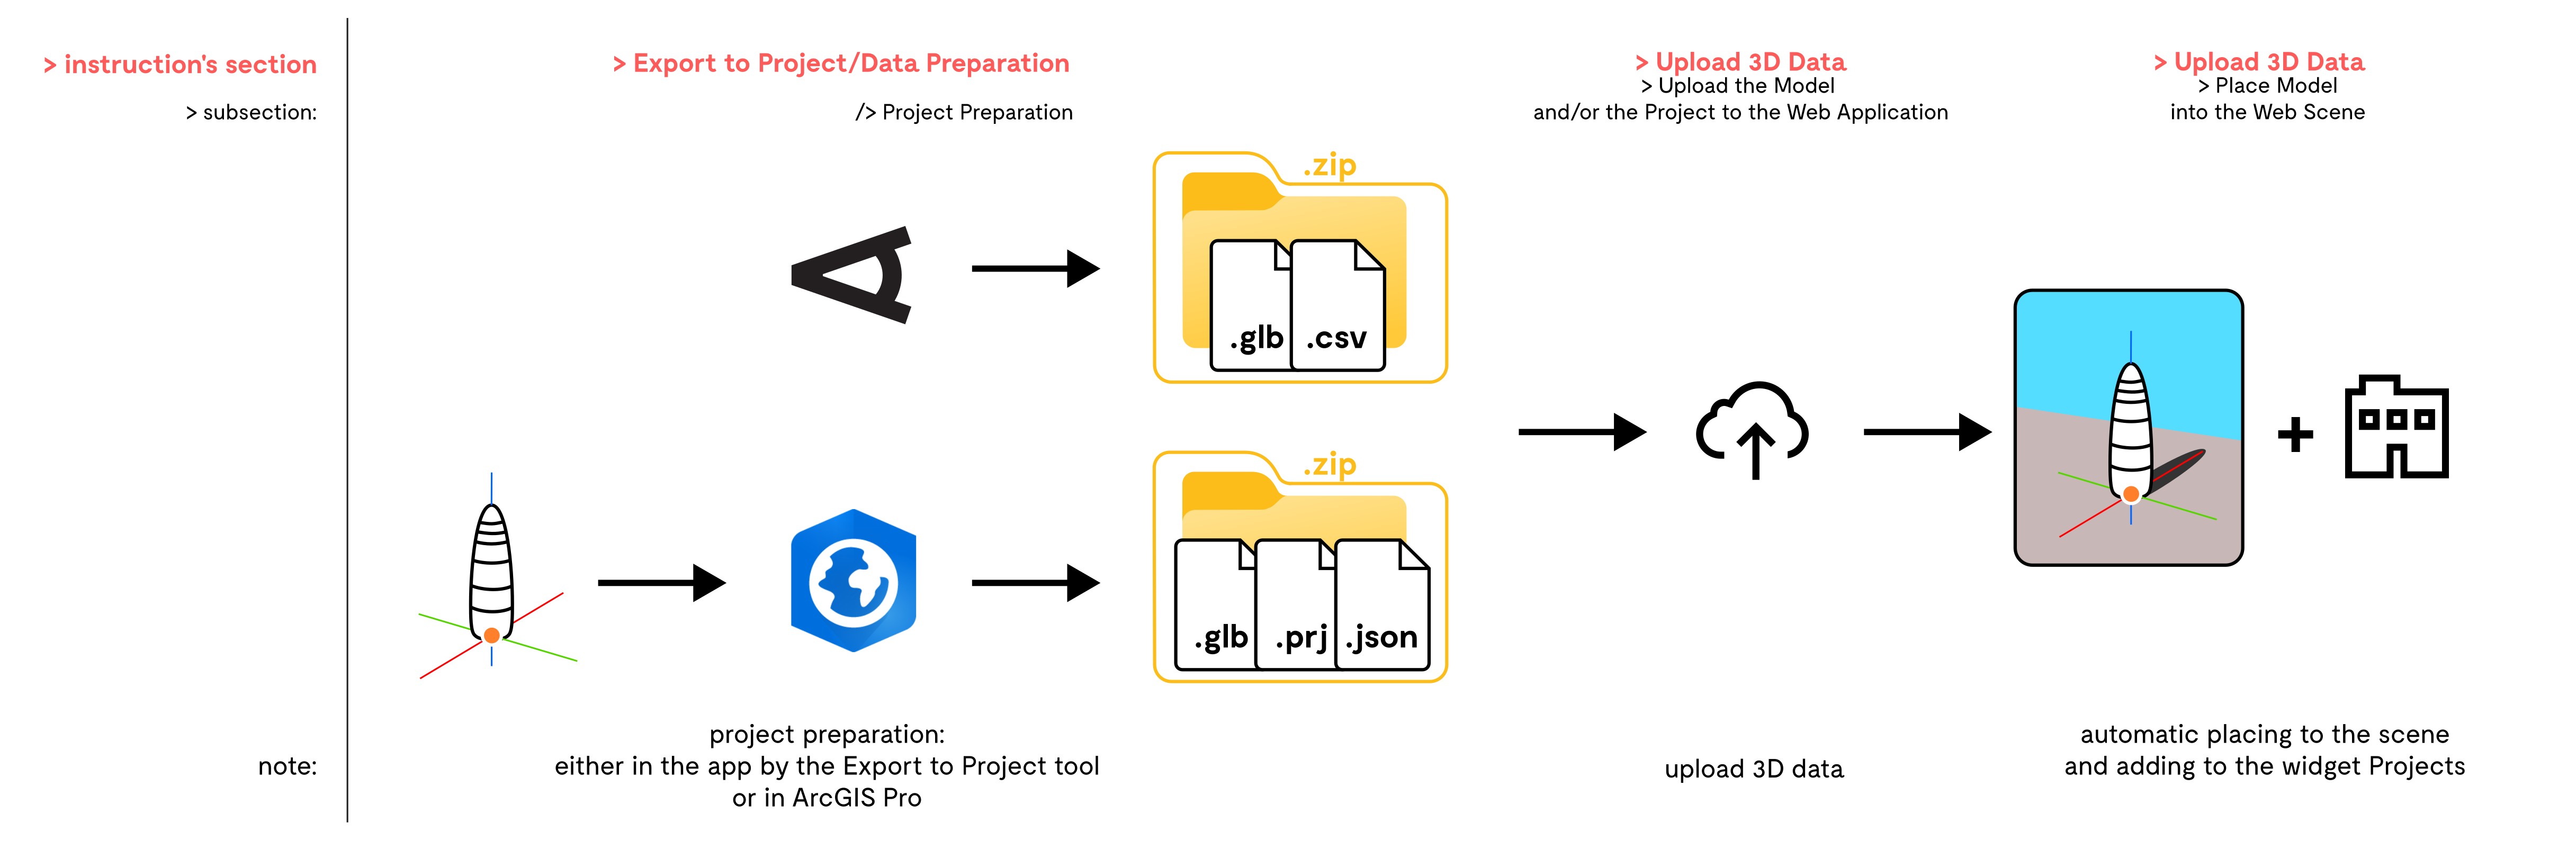
Upload the Model and/or the Project to the Web Application
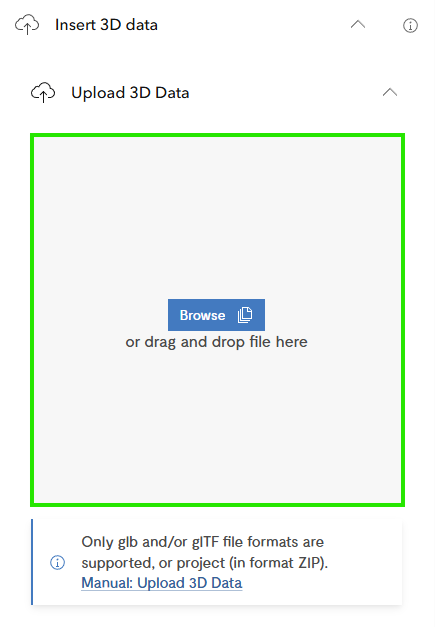
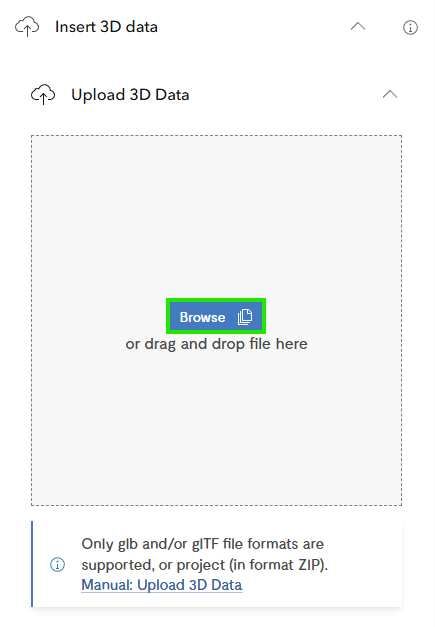
There are two ways how to upload the data (both the model and the project) to the web application. The former is the drag & drop of the file into the square for the uploading (Pic. 1), the latter is the search for the file on the device using the button Browse (Pic. 2).
Place Model into the Web Scene
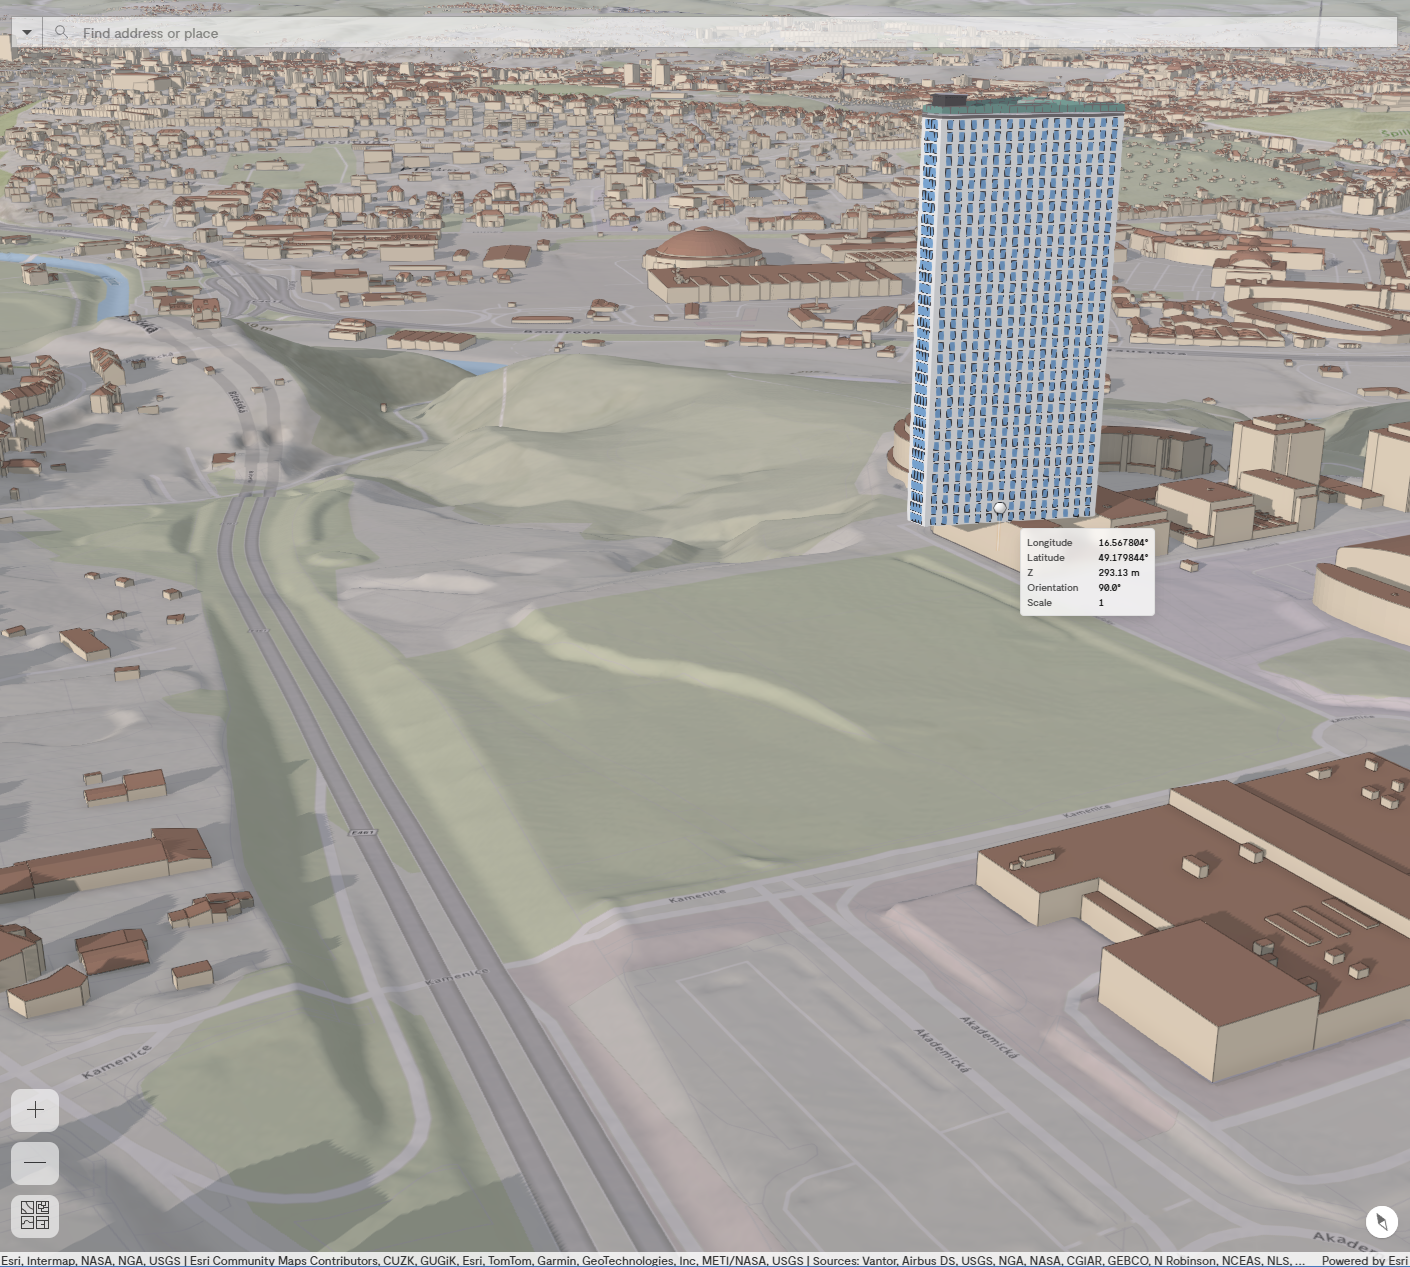
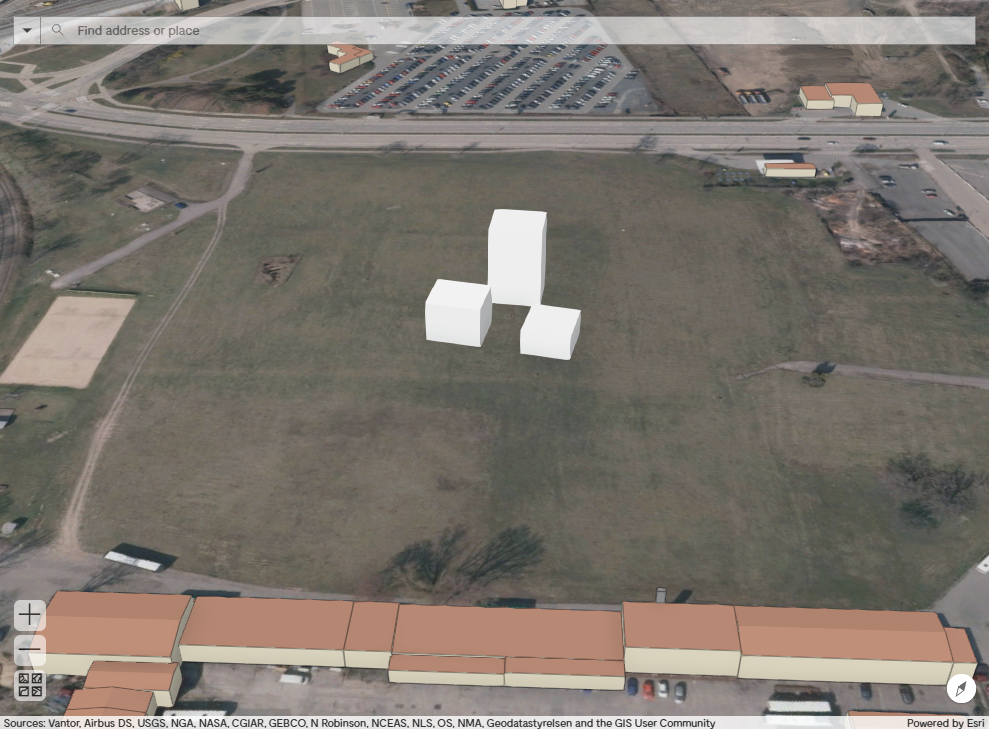
Model is always in the format .glbThe model shows up in the web scene after the successful upload at the position of your cursor (its reference point) but not placed yet. The model snap to the terrain (Pic. 3) as well as to the buildings (Pic. 4). When we find the right position, we place the model by the left click or by the pressing the tabulator and the window for the input of the coordinates, rotation and scale is activated (this funcionality is not available for mobile). Press Enter to confirm the values.
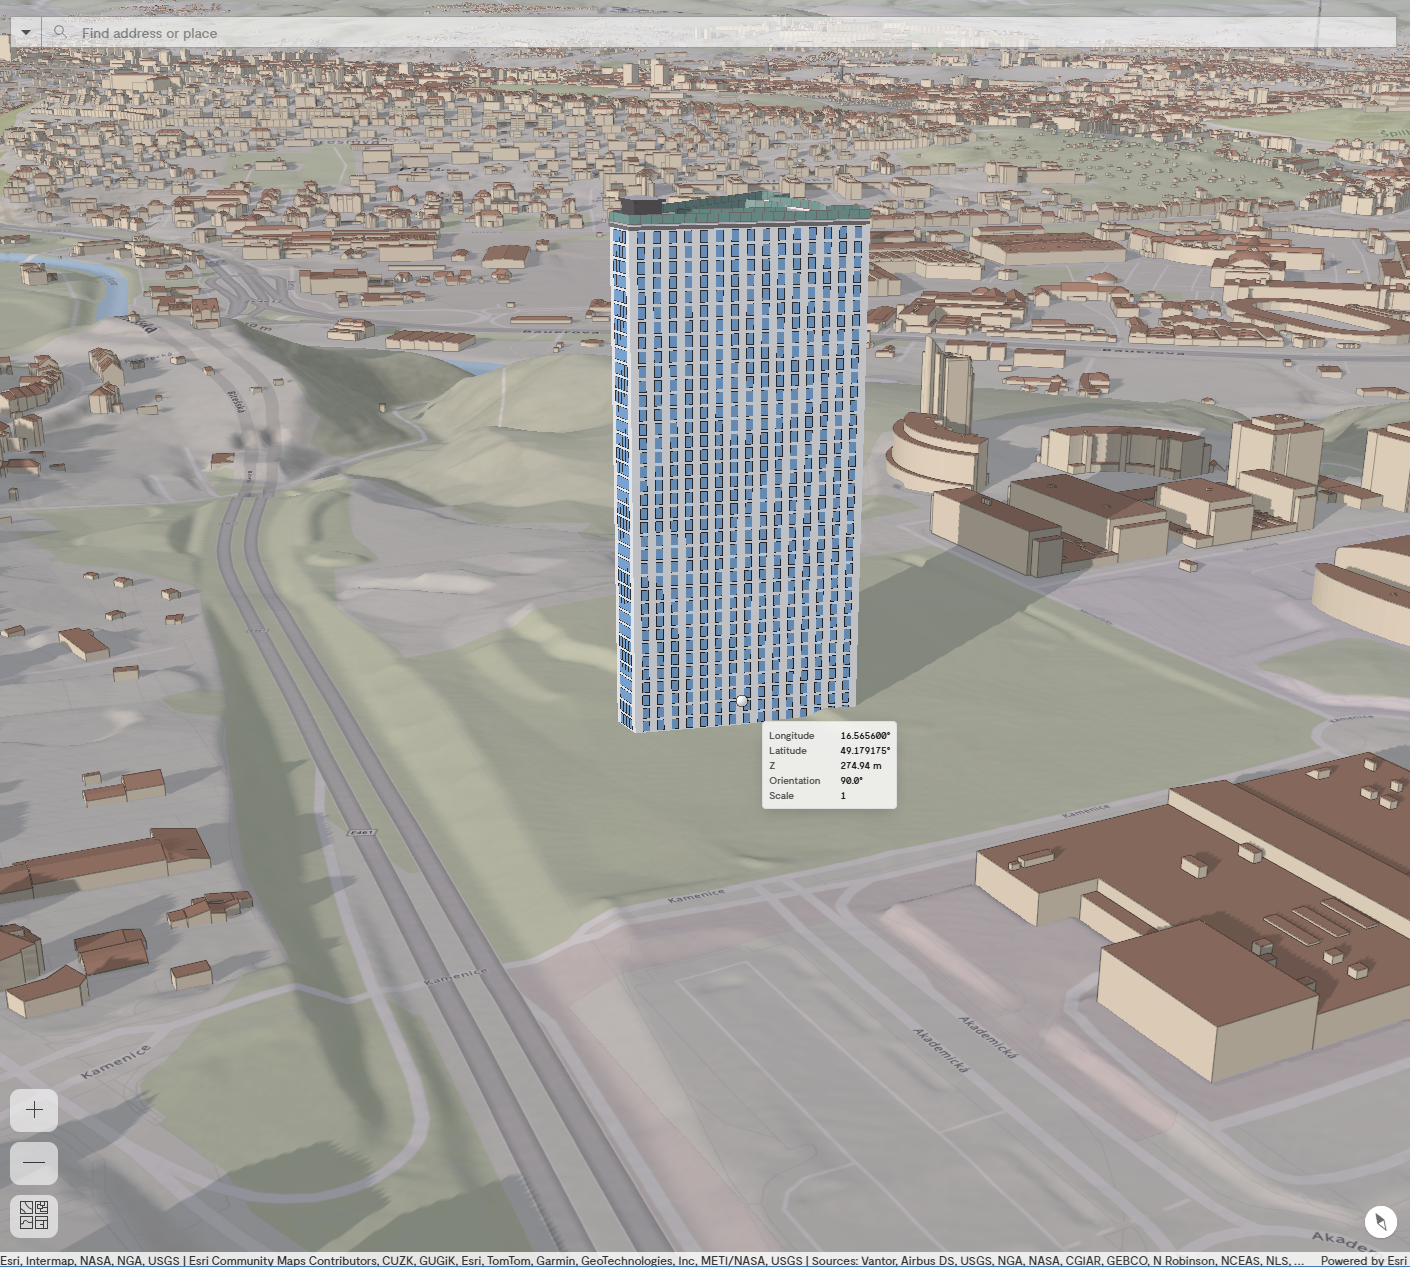
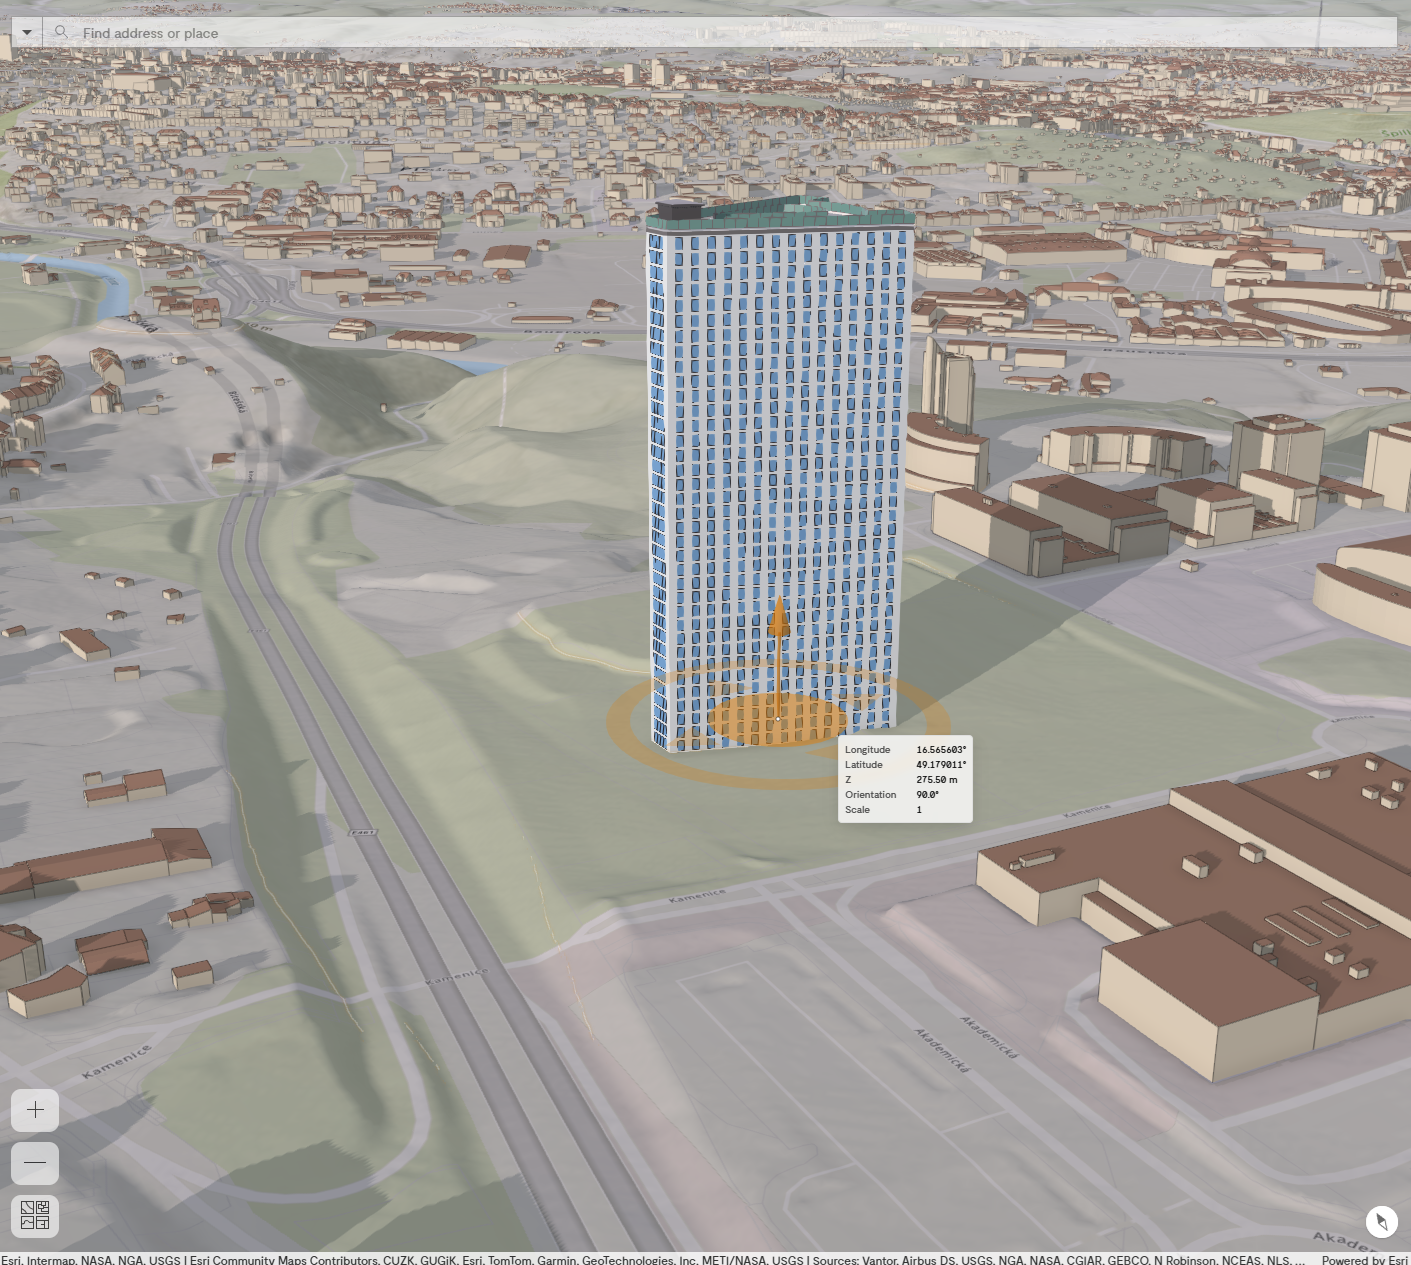
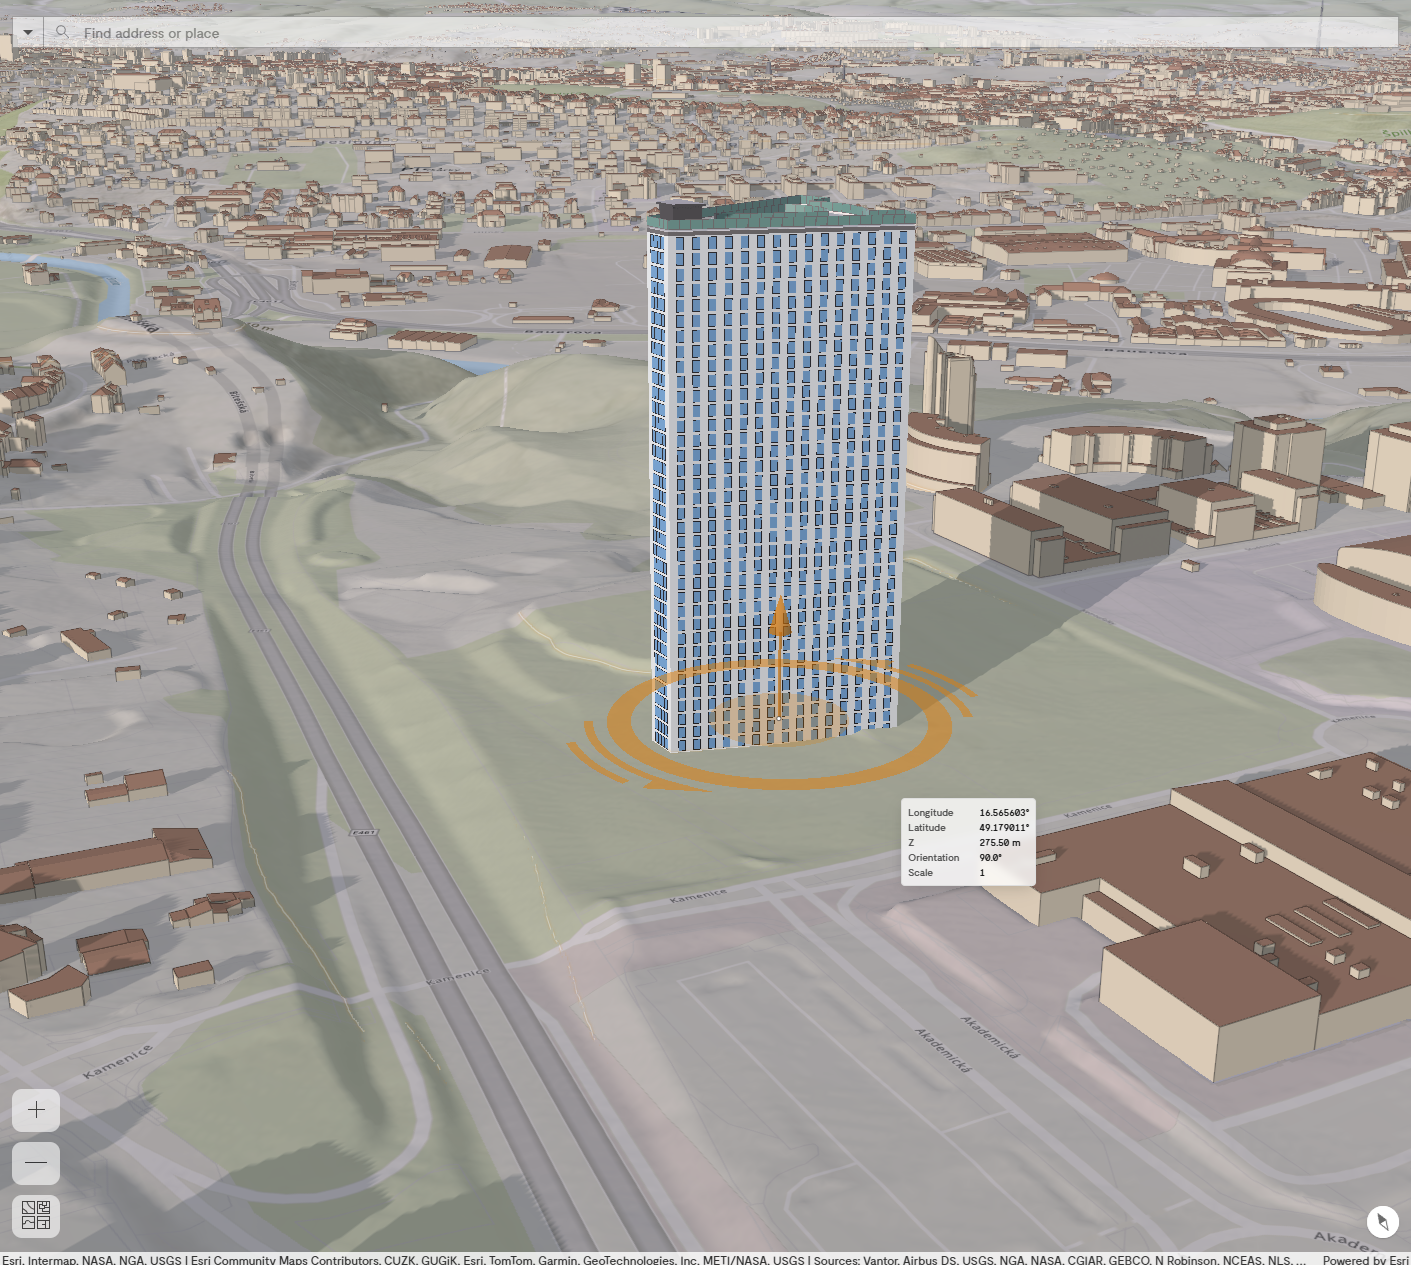
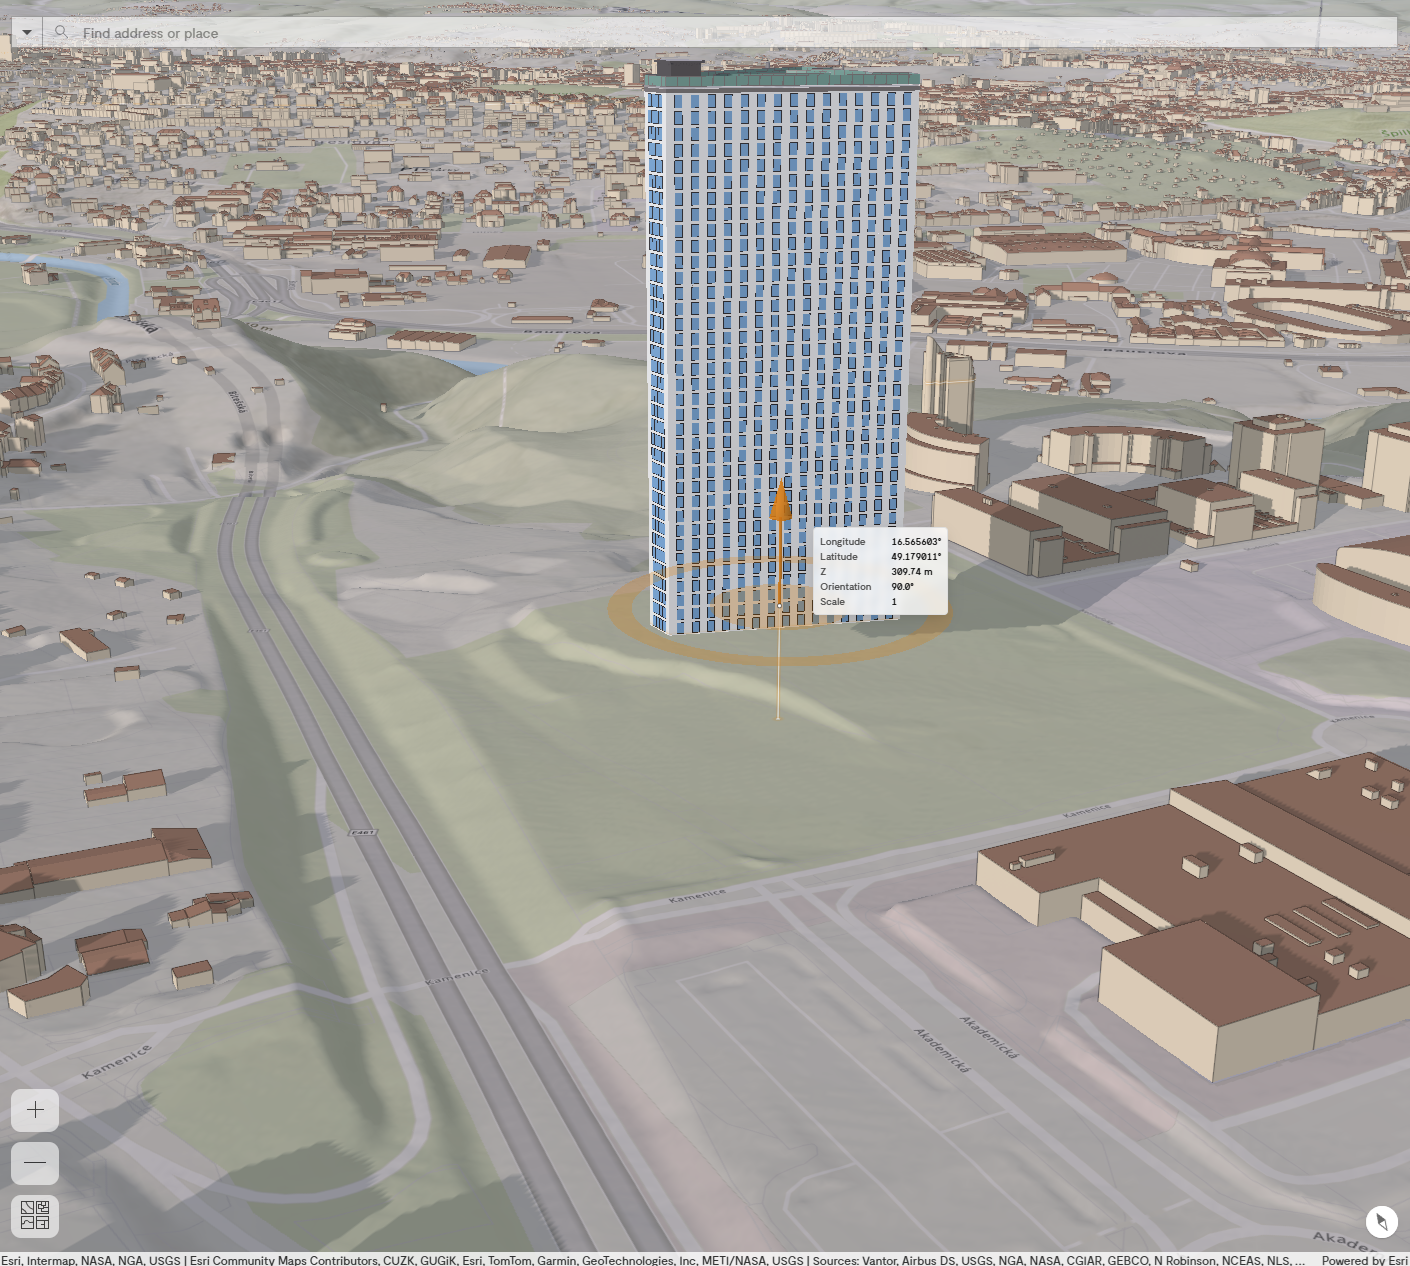
The position (orange middle circle; Pic. 5), rotation or scale (orange circumferential circle; Pic. 6), and altitude (orange vertical arrow; Pic. 7) can be changed even after the placing of the model. The changes can also be done by pressing the tabulator again for the fine tuning of the position, rotation, scale and altitude.
Place Project into the Web Scene
Project is always in the ZIP archive with the prescribed schema.When you select the ZIP archive on the disk, the window appears for typing the name of the project (more in the subsection Project's name) before the automatic adding of the project to the web scene including the right coordinates, rotation, altitude and scale (Placing to the web scene).
Project’s name
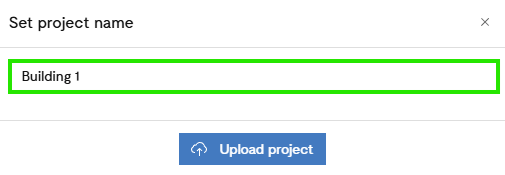
After the project was successfully uploaded to the application (Upload the Model and/or the Project to the Web Application), the pop-up window shows up, where you set the name of the project (Pic. 8). The field is automatically pre-filled but you can modify the name as you wish. Press Upload Project to confirm the name.
Placing to the web scene
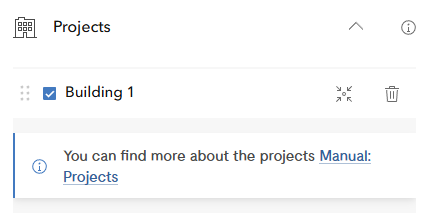
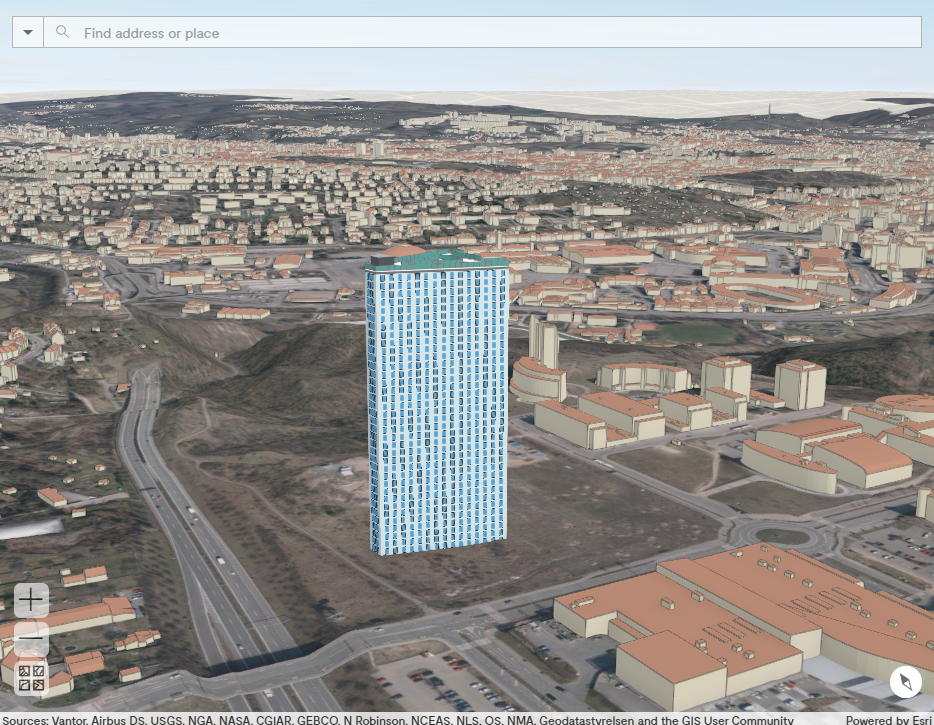
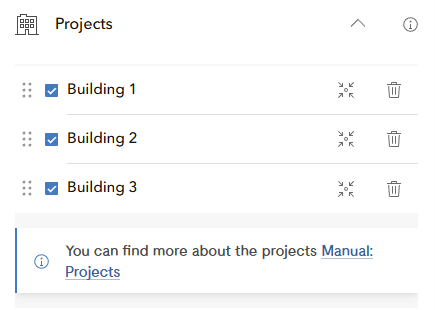
After the confirmation of the project’s name, the new item with that name of the project turns up in the widget Projects (Pic. 9) and the model of the project place itself to the web scene on the right coordinates (Pic. 10). You can insert other projects in the same way (Pic. 11, Pic. 12).
Smazání modelu a/nebo projektu
The model is removed from the application by left click on it in the web scene and pressing the Delete button. The project can be removed only by the widget Projects.
If you reload the window, all the models and projects will be removed!