Export to Project

Tool Activation

First of all you need to insert the model in the .glb format to the application (upload a place). This activates the Export to Project tool.

Pic. 1 Export to Project tool inactivated
The Project’s name

The name of the project is pre-filled (Pic. 2), but you can modify it as you wish (e.g. Building 1 Pic. 3).

Pic. 2 Export to Project tool activated
Pic. 3 Project’s name setting
ZIP archive → Project

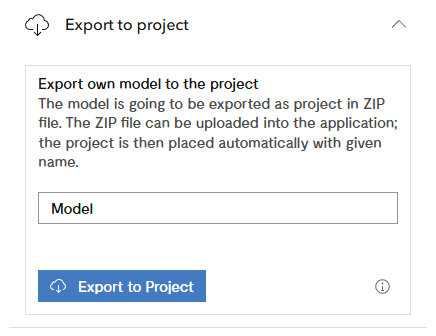
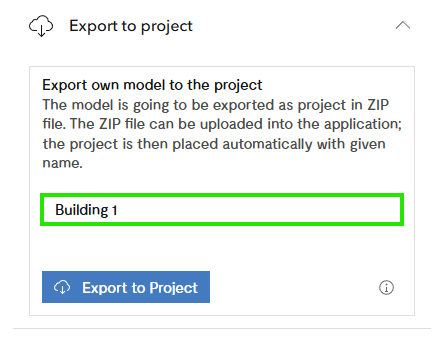
Press the button Export to Project to create the ZIP archive (Pic. 4). This ZIP archive can be later again uploaded and placed to the application, this time as the project.

Pic. 4 ZIP archive in the Downloads

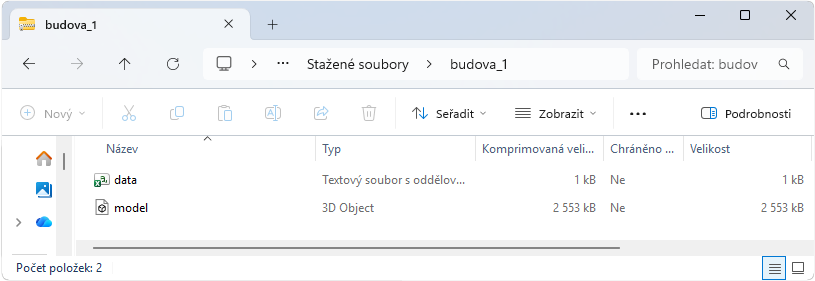
The ZIP archive contains these files (Pic. 5):

  • model.glb (Pic. 6) represents the model in .glb.
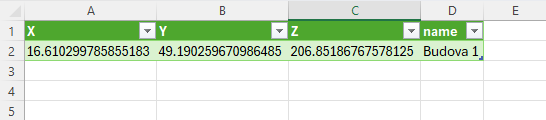
  • data.csv (Pic. 7) contains the X, Y, Z coordinates of the reference point and the project’s name
Pic. 5 Folder with the files model.glb and data.csv
Pic. 6 The file model.glb displayed in the application Babylon.js
Pic. 7 The attributes of the data.csv